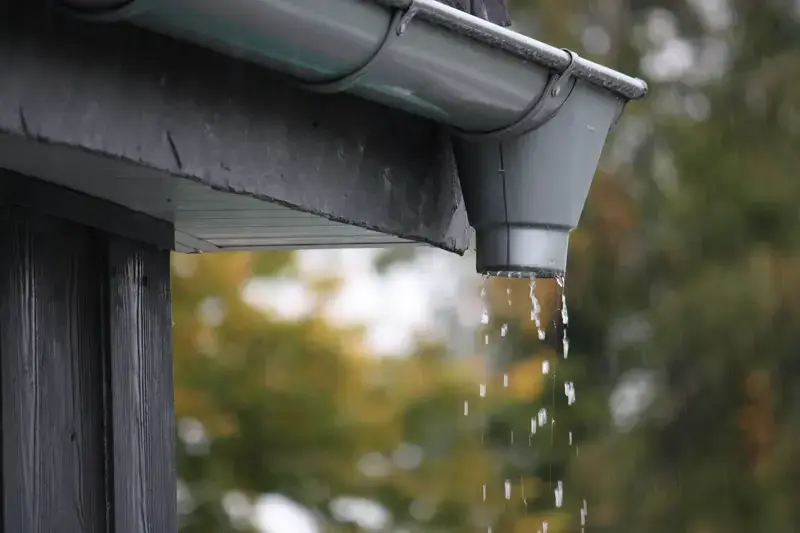
A leaking gutter joint might seem like a small household problem, especially when water escapes from just one connection during rainfall. However, even a minor leak can gradually create expensive damage if it is ignored. Water dripping from gutter connections can stain exterior walls, damage fascia boards, weaken wooden structures, and collect around the foundation of a property.
Imagine standing outside your home during a rainy afternoon and noticing water dripping from the middle of a gutter rather than flowing toward the downspout. You might assume the problem will disappear once the rain stops. Unfortunately, repeated exposure to moisture can make the situation worse, particularly when the joint has loose fasteners, deteriorated sealant, or accumulated debris.
The good news is that most minor gutter connection problems can be repaired without replacing the entire drainage system. Identifying the source of the leak, cleaning the affected area, choosing an appropriate gutter sealant, and securing the connection can restore proper performance.
Understanding why a leaking gutter joint develops is equally important. A repair that addresses only the visible dripping may not solve the underlying issue. Temperature changes, poor installation, corrosion, physical damage, and incorrect gutter alignment can all contribute to recurring leaks.
This guide explains how to recognize gutter joint problems, select suitable repair materials, seal leaking connections, and prevent future damage. Whether you are dealing with an aluminum, vinyl, steel, or sectional gutter system, the right approach can help extend its service life and protect your home.
What Is a Leaking Gutter Joint and Why Does It Matter?
A gutter joint is the connection where two separate gutter sections meet. In sectional gutter systems, these connections are usually secured with joining brackets, connectors, screws, and waterproof sealant.
Their purpose is to create a continuous channel that carries rainwater toward the downspouts. When a connection becomes loose, cracked, or improperly sealed, water can escape through small openings.
A leaking gutter joint is not always immediately noticeable. Sometimes the first indication is a damp patch beneath the roofline. In other situations, water may drip only during heavy rainfall or when debris causes water to collect around the connection.
How Gutter Joints Support Proper Drainage
Gutter systems depend on several connected components working together. The channels collect rainwater, the joints maintain continuity, and the downspouts transport runoff away from the building.
If one connection fails, the drainage system may lose efficiency even when the remaining gutter sections are in good condition.
For example, a homeowner may have recently cleaned the gutters but still notice water escaping from a corner connection. This happens because cleaning removes debris but does not automatically restore damaged seals or loose connectors.
Why Small Leaks Can Cause Bigger Problems
Water escaping from a gutter joint repeatedly can affect nearby building materials. Wooden fascia boards may absorb moisture, exterior paint can deteriorate, and water may reach areas that are difficult to inspect.
If runoff collects close to the foundation, it may also contribute to soil saturation and moisture problems.
According to the US Environmental Protection Agency, controlling moisture is an important part of preventing mold growth indoors. Persistent leaks and damp building materials should therefore be addressed promptly rather than treated as purely cosmetic problems.
Common Causes of Gutter Joint Leaks
Finding the actual cause is the first step toward an effective repair. Applying additional sealant without understanding why the connection failed can lead to another leak within a short period.
Deteriorated or Cracked Gutter Sealant
Sealant is exposed to sunlight, rain, temperature fluctuations, and seasonal movement. Over time, some products lose flexibility, become brittle, or separate from the gutter surface.
Once the waterproof barrier breaks down, water can pass through the connection.
This is particularly common in older sectional gutter systems that have not received regular inspections.
Loose Gutter Connectors and Fasteners
Gutter sections are exposed to changing temperatures, wind, accumulated debris, and the weight of water. These conditions can gradually loosen connectors and supporting fasteners.
When two sections move independently, the original seal may separate.
A leaking gutter joint caused by loose connectors should be repaired by addressing the mechanical connection as well as the waterproof seal.
Incorrect Gutter Installation
Installation quality has a direct influence on gutter performance. If sections are not aligned properly, connectors may not fit securely, and sealant may fail to cover the entire connection.
Incorrect slope can also cause water to collect near a joint instead of flowing toward the downspout.
A gutter system should be positioned according to its manufacturer’s specifications and the drainage requirements of the roof.
Blockages and Excessive Water Pressure
Leaves, twigs, roof granules, and dirt can restrict water movement. When debris blocks the normal drainage route, water may accumulate inside the gutter.
Although gutter joints are not designed to withstand constant standing water, blockages can expose weak connections to prolonged moisture and increased loading.
Cleaning the entire gutter system is therefore an important part of diagnosing a leak.
Corrosion, Cracks, and Physical Damage
Metal gutters may develop corrosion, particularly when protective coatings deteriorate. Vinyl sections can crack because of aging, impact, or temperature changes.
Sometimes the leak appears to originate from a joint when the actual problem is a crack immediately beside the connector.
Carefully inspecting the surrounding material helps prevent an ineffective repair.
How to Identify a Leaking Gutter Joint
You do not need complicated equipment to recognize many gutter connection problems. A visual inspection, particularly after rainfall, can reveal several warning signs.
Look for Water Dripping From Connections
The clearest indication is water escaping from a seam while the gutter is carrying rainwater.
Observe whether the dripping occurs directly beneath a connector, around a corner, or along the bottom of a gutter section.
Avoid assuming every drip indicates a failed seal. Overflow from an upstream blockage can travel along the exterior of the gutter and appear to originate from a different location.
Check for Water Stains and Rust Marks
Brown streaks, dark patches, and discoloration beneath gutter connections may indicate repeated water exposure.
On metal gutters, rust around a seam can suggest that moisture has remained trapped near the connection.
On wooden fascia boards, peeling paint or soft areas deserve particular attention.
Inspect for Sagging and Misalignment
A gutter joint should remain properly aligned with the adjoining sections.
If one side has dropped, the connector may have become loose or the supporting brackets may have failed.
Misalignment can create gaps that allow water to escape, especially during heavy rainfall.
Perform a Controlled Water Test
After visually inspecting the system, a controlled hose test can help locate the leak.
Use a gentle flow of water rather than directing a powerful stream into the gutter. Observe the connection and check whether water escapes from the same location.
Only perform an inspection from a safe position. Do not climb onto a wet roof or lean dangerously from a ladder.
Best Materials for Sealing a Leaking Gutter Joint
Choosing the correct repair product is essential for creating a durable, waterproof connection. Not every adhesive or household sealant is suitable for exterior gutter repairs.
The material should withstand rain, sunlight, temperature changes, and the natural expansion and contraction of the gutter sections.
Gutter and Roofing Sealant
Specialized gutter sealant is one of the most commonly used products for repairing leaking connections. It is formulated to create a waterproof barrier on compatible gutter materials.
Some products are designed specifically for aluminum or galvanized steel, while others can be used with several metal and plastic surfaces.
Check the manufacturer’s instructions for surface preparation, application temperature, and curing time. A sealant that works well on metal may not bond properly with every type of vinyl.
Silicone Sealant
Exterior-grade silicone sealant offers flexibility and resistance to moisture. It can be suitable for certain gutter applications when the manufacturer confirms compatibility with the gutter material.
However, ordinary bathroom or interior silicone should not automatically be used for outdoor gutter repairs. Some formulations are not designed for prolonged weather exposure or specific roofing materials.
Always select a product intended for the actual application.
Polyurethane Sealant
Polyurethane sealants are valued for their strong adhesion and flexibility. Certain exterior-grade formulations are suitable for sealing metal joints and other building connections.
They can tolerate movement better than some rigid sealing materials, making them useful where temperature changes cause slight expansion and contraction.
Their suitability depends on the product specification and the surface being repaired.
Butyl Rubber Sealant
Butyl-based products provide flexible, water-resistant sealing and are available in different forms, including tapes and sealants.
They may be useful for certain gutter connections, particularly where a flexible waterproof barrier is required.
Before purchasing butyl gutter repair tape, check whether it is compatible with the gutter material and whether the product is intended for permanent exterior exposure.
How to Seal a Leaking Gutter Joint Step by Step
Repairing a minor leaking gutter joint is often manageable when the surrounding gutter material remains in good condition.
The most important principle is preparation. Applying new sealant over dirt, moisture, or deteriorated material usually produces an unreliable repair.
Step 1: Choose a Safe Time for Repair
Choose a dry day with suitable temperatures for the sealant you intend to use.
Avoid working during rainfall, strong winds, or when the gutter surface is wet. Water can interfere with adhesion and make the repair area slippery.
If the gutter is difficult to reach, positioned above a steep roof, or close to electrical lines, arrange professional assistance rather than attempting an unsafe repair.
Step 2: Clean the Affected Connection
Remove leaves, mud, dust, and other debris from the gutter.
Next, carefully remove loose or deteriorated sealant around the leaking connection. A suitable plastic scraper can help avoid scratching or damaging the gutter surface.
Clean the surrounding area using a method recommended by the sealant manufacturer.
Allow the surface to dry completely unless the selected product specifically permits application to damp surfaces.
Step 3: Examine the Connector and Gutter Sections
Before applying new material, inspect the connection for movement, cracks, corrosion, and distorted edges.
If the gutter sections have separated, determine whether the connector needs tightening or replacement.
A leaking gutter joint caused by structural movement will probably continue leaking if you simply cover the visible gap with additional sealant.
Step 4: Apply the Appropriate Sealant
Apply a continuous bead of compatible gutter sealant along the connection according to the product instructions.
Pay particular attention to the areas where the gutter sections overlap or meet the joining component.
Avoid applying excessive material. A neat, continuous application generally provides a better result than covering the entire connector with a thick layer.
Use an appropriate applicator or tool to finish the seal without leaving gaps.
Step 5: Allow the Sealant to Cure
Curing time varies considerably between products. Some sealants develop an initial skin relatively quickly but require much longer to reach their intended performance.
Follow the manufacturer’s specified curing period before exposing the repaired connection to water.
Rushing this stage can weaken the bond and cause the leaking gutter joint to fail again.
Step 6: Test the Repaired Connection
Once the sealant has cured, perform a gentle water test.
Introduce water into the gutter and observe the repaired section. Check whether the connection remains dry and whether water flows freely toward the downspout.
If moisture continues escaping, investigate whether the leak comes from an adjacent crack, damaged connector, or incorrectly aligned gutter section.
When Should You Replace a Gutter Joint Instead of Sealing It?
Not every gutter connection can be restored with sealant. Sometimes replacing the connector or an entire gutter section is a more reliable and economical solution.
Extensive Cracks or Corrosion
If the metal surrounding a joint has developed deep corrosion or multiple holes, sealant may provide only temporary relief.
Similarly, a severely cracked vinyl gutter may not offer a stable surface for a long-lasting repair.
In these situations, replacing the damaged component is usually preferable.
Repeated Leaks After Previous Repairs
A connection that continues leaking despite proper cleaning and sealing may have an underlying structural problem.
The gutter sections might be distorted, the connector may be damaged, or the system may be carrying water incorrectly because of poor alignment.
Repeatedly applying new sealant without correcting these issues wastes time and money.
Loose or Damaged Gutter Connectors
If the connector no longer holds the gutter sections together securely, replacing it may be necessary.
A new connector designed for the specific gutter profile can restore the mechanical connection and provide a suitable surface for sealing.
Widespread Gutter Deterioration
Sometimes the problem extends beyond a single connection. Multiple leaks, sagging channels, damaged brackets, and extensive corrosion may indicate that the entire gutter system is approaching the end of its useful life.
A professional inspection can help determine whether repairing individual joints remains worthwhile.
How to Prevent Gutter Joint Leaks in the Future
Preventive maintenance is usually easier and less expensive than repeatedly repairing water damage.
A few practical habits can help keep gutter connections secure and reduce the risk of another leaking gutter joint.
Clean Gutters Regularly
Leaves, dirt, roof granules, and small branches can restrict water movement.
Inspect gutters throughout the year, particularly during seasons when nearby trees shed leaves. Remove accumulated debris and make sure water can reach the downspouts.
Gutter guards can reduce debris accumulation, although they still require periodic inspection and cleaning.
Inspect Sealant and Connectors
Check visible joints for cracks, gaps, or signs of separation.
Pay attention to corners, end caps, and downspout outlets because these areas contain additional connections that may develop leaks.
Addressing a small deterioration early can prevent more extensive repairs later.
Maintain Proper Gutter Alignment
A properly aligned gutter allows rainwater to move toward the downspouts instead of collecting around connections.
Have sagging sections and loose brackets corrected before they place additional stress on gutter joints.
If standing water repeatedly appears after rainfall, investigate the slope and drainage capacity.
Trim Overhanging Tree Branches
Branches hanging directly above the roof can introduce leaves, twigs, and other debris into gutters.
They may also damage gutter sections during storms.
Keeping trees appropriately maintained reduces debris accumulation and limits unnecessary physical contact with the drainage system.
Arrange Periodic Professional Inspections
Professional inspections are particularly valuable for older homes, multi-story properties, and gutter systems that have experienced repeated leaks.
An experienced contractor can identify hidden damage, check connections, and recommend suitable repairs before the next rainy season.
The Importance of Proper Drainage After Gutter Repairs
Repairing a leaking connection is only one part of protecting your property. The entire drainage route must function correctly.
Even a perfectly sealed gutter joint cannot prevent foundation problems if downspouts discharge water directly beside the building.
Make sure downspout extensions direct runoff toward suitable drainage areas. Check that the ground does not slope toward the foundation and that water cannot collect around the base of exterior walls.
The US Environmental Protection Agency emphasizes controlling moisture at its source, maintaining roof gutters, and ensuring that surrounding ground slopes away from the foundation.
If your property has recurring drainage problems, consider consulting a drainage professional. Underground drainage pipes, suitable discharge points, and appropriate surface grading may be necessary.
A complete drainage solution protects more than the gutter system. It helps preserve the roofline, exterior structure, landscaping, and foundation.
Common Mistakes to Avoid When Repairing Gutter Joints
Even a straightforward repair can fail when important preparation steps are overlooked.
One common mistake is applying sealant over an existing layer of cracked material. New sealant may not bond properly with the old surface, allowing water to find another path through the connection.
Another mistake is ignoring the gutter’s alignment. If the sections are sagging or holding standing water, sealing the joint will not address the underlying drainage problem.
Using incompatible products is equally problematic. Always check whether the sealant is suitable for aluminum, steel, vinyl, or the particular gutter material being repaired.
Homeowners should also avoid testing repairs before the sealant has cured. Following the manufacturer’s instructions is essential for achieving the intended waterproof performance.
Finally, never underestimate working-at-height risks. The Occupational Safety and Health Administration recommends maintaining three points of contact when climbing or descending a ladder and avoiding unstable ladder placement.
If a repair requires working on a steep roof or an inaccessible gutter, hiring a qualified professional is the safer decision.
Conclusion
A leaking gutter joint may appear to be a minor maintenance issue, but ignoring it can expose your home to unnecessary moisture and water damage. Fortunately, many connection problems can be resolved through careful inspection, proper cleaning, compatible sealant, and secure gutter fittings.
The key is identifying the actual cause before starting the repair. Deteriorated sealant, loose connectors, blockages, and damaged gutter sections require different solutions.
Regular cleaning, checking connections, maintaining proper alignment, and inspecting downspouts can significantly reduce the chances of recurring leaks.
Whether you choose a simple DIY repair or professional gutter maintenance, taking action early helps preserve your drainage system and protects your property against avoidable water damage.